

How to Use Foam Roller for Muscle Recovery
The Science Behind Foam Rolling
So, you've probably seen folks at the gym or your favorite athletes on TV rolling around on foam rollers. You might be wondering, "What's the deal with foam rolling, and does it actually work?" Well, let's dive into the science behind foam rolling and unravel the magic it brings to your muscles.
Why Do Muscles Get Tense, Anyway?
You know that feeling when your muscles tighten up, and it's as if they've turned into stubborn knots? It happens to the best of us. When you work out or simply go about your day, your muscles contract and relax. But sometimes, due to stress, overuse, or injury, they can get stuck in the contracted phase, causing discomfort and pain.
Enter Foam Rolling, Your Muscle Masseuse
Foam rolling is like a DIY massage for your muscles, and it works through a process called "self-myofascial release" (we'll call it SMR for short because who wants to say that tongue-twister?). SMR is like giving your muscles a little nudge to let go of their tension.
The Fascinating Fascia
To understand foam rolling better, you need to meet your fascia. It's the connective tissue that wraps around your muscles, and sometimes, it can become tight and knotted, contributing to muscle discomfort. Foam rolling directly targets this fascia, helping it relax.
How Does It Work, Exactly?
Imagine you're rolling dough with a rolling pin. In this case, the foam roller is your rolling pin, and your muscles are the dough. As you roll back and forth, the pressure from the foam roller helps release tension in the fascia, allowing your muscles to return to their relaxed state. It's like coaxing your muscles back to their happy place.
Breaking Down Muscle Knots
Those pesky muscle knots? Foam rolling can help break them down. When you apply pressure with the foam roller, it increases blood flow to the area. This enhanced blood flow brings oxygen and nutrients to your muscles, which aids in repairing and releasing tension.
Foam Rolling and Pain Relief
Ever experienced post-workout soreness that makes you wince when you move? Foam rolling might be your best buddy in such situations. It can help reduce muscle soreness by promoting blood flow and reducing muscle tightness.
The 'Feel Good' Hormones
When you foam roll, your body releases endorphins, those magical "feel good" hormones. It's like your muscles are saying, "Thanks for the TLC!" And in return, your brain rewards you with a dose of those delightful endorphins, leaving you feeling relaxed and content.
For Flexibility and Range of Motion
Flexibility and a good range of motion in your joints are essential for your overall well-being. Foam rolling can enhance both. It helps to relax tight muscles, improving your joint's mobility, which is especially beneficial for athletes and active individuals.
Warming Up and Cooling Down
Foam rolling is a fantastic addition to your warm-up and cool-down routines. Before a workout, it prepares your muscles for action, reducing the risk of injury. After exercising, it's like a gentle massage that helps your muscles recover faster.
Let's Get Practical: How to Foam Roll
Now that we've explored the science behind foam rolling, it's time to get practical. But remember, using a foam roller is a bit like cooking – there are some basic principles, but you can get creative with your own moves. Here's a simple guide to get you started:
Step 1: Choose Your Roller
There are various types of foam rollers, from smooth ones to textured ones with bumps and ridges. A smooth roller is excellent for beginners. As you advance, you can explore the textured options. It's like starting with the basics and moving on to more complex recipes.
Step 2: Find Your Target Muscle
Identify the muscle or muscle group that needs some love. It might be your quads after a long run or your upper back from hours at the desk. Each muscle group has its foam rolling technique.
Step 3: Apply the Right Pressure
Position yourself on the foam roller, so it's beneath the target muscle. Gently roll back and forth, applying the right amount of pressure. If it feels intense, you can ease up a bit – no need to turn your muscles into dough pancakes.
Step 4: Roll Slowly
Roll at a slow and steady pace. This isn't a race; it's a soothing massage for your muscles. As you roll, you may encounter tight or sore spots. Spend a little extra time on these areas, like giving them a little extra kneading.
Step 5: Breathe and Relax
As you foam roll, take deep breaths and relax into the process. It's not a "no pain, no gain" situation. The idea is to gently coax your muscles into relaxation, not to torture them.
Step 6: Repeat as Needed
You can repeat the foam rolling process for each muscle group or any tight spots. It's all about what your body needs.
Foam Roller Techniques for Post-Workout Relief
You've just crushed your workout, and your muscles are sending out S.O.S signals. It's the perfect time to dive into some foam roller therapy. These techniques will have you saying, "Ahh, that's the stuff!"
1. The Quad Soother
Your quadriceps (those big muscles on the front of your thighs) often take a beating during workouts. To ease the tension, start by lying face down with the foam roller under your thighs. Roll slowly from your hips to just above your knees. When you find a tender spot (you'll know it when you feel it), pause and take a few deep breaths. It's like giving your quads a little pep talk.
2. The IT Band Unwinder
Your IT (iliotibial) band, a thick strip of connective tissue along the outer thigh, can get cranky after a run. To show it some love, lie on your side with the foam roller under your hip. Roll along the side of your thigh from your hip to just above your knee. Be gentle – this area can be sensitive. Feel the tension melt away.
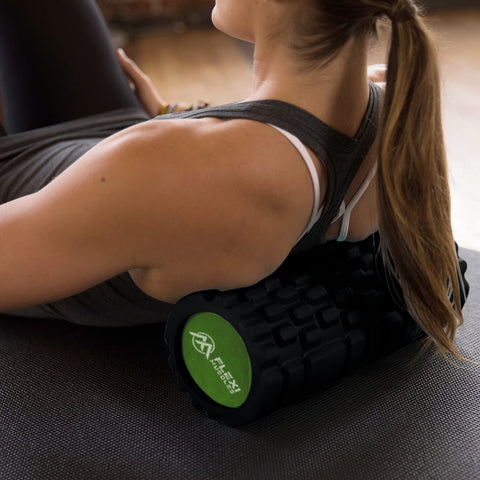
3. The Back Booster
After a day hunched over a desk or a grueling upper-body workout, your upper back might be screaming for attention. To give it the TLC it deserves, place the foam roller under your upper back, cross your arms over your chest, and lift your hips off the ground. Roll from your upper to mid-back. It's like a mini massage for your work-weary back.
4. The Glute Relaxer
Those butt muscles have been working hard, and they need some relaxation. Sit on the foam roller with your feet flat on the floor. Cross one ankle over the opposite knee, tilt slightly to one side, and roll over your glutes. Find those tight spots and let the foam roller work its magic. You'll feel the tension releasing.
5. The Calf Soothe
Your calves can tighten up after a run or leg day. To ease the tension, sit on the floor with your legs extended. Place the foam roller under your calves. Roll from your ankles to just below your knees. Pause on any sore spots, and imagine the tension melting away.
6. The Shoulder Melt
Working on your shoulders? After your workout, use the foam roller to release shoulder tension. Lie on your back with the foam roller beneath your upper back and gently roll from the base of your neck to your mid-back. Take it slow and don't rush – you're giving your shoulders a break they'll thank you for.
3 Tips for Effective Foam Rolling
Breathe and Relax: As you foam roll, remember to breathe deeply and relax your muscles. It's not about powering through pain but letting your muscles unwind.
Roll Slowly: Slow and steady wins the race here. Rushing through the process won't allow your muscles to release effectively.
Drink Water: After foam rolling, be sure to hydrate. It helps your body flush out toxins released during the process.
Foam Rolling for Enhanced Flexibility
Are you dreaming of touching your toes or doing the splits like a pro gymnast? Well, it's time to roll your way to enhanced flexibility with your trusty foam roller. Let's dive into the wonderful world of flexibility and discover how foam rolling can help you reach those newfound heights!
Why Flexibility Matters
So, why is flexibility essential? Think of your muscles and joints like well-oiled machinery. When they're flexible, they move smoothly and efficiently. But when they're stiff, it's like trying to run a marathon in flip-flops – not the best idea. Enhanced flexibility can improve your athletic performance, reduce the risk of injuries, and make daily movements feel like a breeze.
The Magic of Foam Rolling
Now, here's where the foam roller comes into play. It's like a magical wand for your muscles. Foam rolling helps release tension in your muscles, promoting blood flow and increasing their elasticity. It's like giving your muscles a gentle nudge to stretch further and relax.
Flexibility and Foam Rolling: A Dynamic Duo
Foam rolling and flexibility go hand in hand. By targeting specific muscle groups, you can unlock their potential for greater flexibility. As you roll, you'll be telling your muscles, "Hey, it's time to chill out and stretch!" Let's explore some key techniques to boost your flexibility with a foam roller.
1. Limber Up Those Legs
Let's start with your lower body – your legs are prime candidates for enhanced flexibility. If you've got tight hamstrings or calf muscles, grab your foam roller. Sit down with your legs extended and place the roller under your hamstrings. Roll from your knees to your hips, and when you find a tight spot, pause and breathe. The tension will slowly give way, and your legs will thank you.
2. Open Up Your Hips
Tight hips can be a real flexibility roadblock. To loosen them up, lie on your back with your knees bent and feet flat on the floor. Place the foam roller under your lower back and gently roll it up to your glutes. Feel the stretch in your hip flexors and breathe through it. Your hips will appreciate the newfound freedom.
3. Free Your Back
A flexible spine is a happy spine. If your back feels stiff, try the thoracic spine roll. Sit on the floor with your knees bent, feet flat, and the foam roller beneath your upper back. Roll gently from your shoulder blades to your mid-back. It's like a mini backbend, and it'll keep your spine limber.
4. Reach for the Sky (or Your Toes)
The hamstring stretch with a foam roller is a game-changer. Sit on the floor with your legs extended and the foam roller under your calves. Roll it up and down, feeling the stretch in your hamstrings. It's like reaching for your toes without the struggle.
3 Pro Tips for Flexibility Success
Consistency is Key: Make foam rolling part of your regular routine. The more you do it, the more flexibility you'll gain.
Breathe and Relax: As you roll, take deep breaths and relax into the stretch. It's all about letting go of tension.
Hydrate: Flexibility requires well-hydrated muscles. So, drink your water and keep your muscles happy.
Combining Yoga and Foam Rolling for Total Body
Are you ready to take your self-care routine to the next level? Imagine a world where your muscles are relaxed, your body is flexible, and you're floating on a cloud of tranquility. Well, it's time to explore the fantastic combo of yoga and foam rolling for total body bliss. Let's roll and flow our way to a happier you!
Yoga and Foam Rolling: A Perfect Pair
Picture this: yoga is your serene friend who helps you find inner peace, while foam rolling is your muscle's best buddy, releasing tension and knots. When these two join forces, it's like a superhero duo for your body and mind. Let's see how they work together in perfect harmony.
1. Yoga: The Serene Warm-Up
Your yoga practice is like a gentle warm-up act for your muscles. It prepares your body and mind, making them more receptive to the benefits of foam rolling. Yoga increases your blood flow and stretches your muscles, setting the stage for an epic foam rolling session.
2. Foam Rolling: The Tension Reliever
Now, enter the foam roller – your muscle's personal masseuse. As you roll, it targets specific muscle groups, releasing tension and promoting blood flow. Foam rolling helps your muscles relax, so when you return to your yoga practice, your stretches are deeper, and you feel like a true yogi.
3. Yoga: Enhanced Stretching
When you transition back to your yoga practice after foam rolling, you'll notice a significant difference. Your muscles are primed and ready for deeper stretches, and your flexibility is at its peak. Yoga poses that once felt challenging become more accessible, and you can flow with ease.
4. Foam Rolling: Post-Yoga Recovery
After a rewarding yoga session, your muscles might be craving a little extra love. That's where foam rolling swoops in as the hero of recovery. It helps reduce muscle soreness, so you can walk away from your practice feeling refreshed and rejuvenated.
The Perfect Sequence: Yoga and Foam Rolling
Let's break down how to combine yoga and foam rolling for total body bliss. This sequence is like a mini spa day for your muscles and mind.
1. Start with Yoga:
Begin with a gentle yoga warm-up. Focus on basic poses that stretch your muscles and awaken your body. You're getting ready to roll, and yoga is your backstage pass to flexibility.
2. Foam Rolling Session:
Now, it's foam rolling time. Target the muscle groups you want to work on. Roll slowly and take your time – no need to rush. When you encounter tight spots, pause and breathe. Think of it as a mini massage session.
3. Return to Yoga:
After foam rolling, rejoin your yoga practice. You'll notice how your muscles respond to your stretches more readily. Poses that used to feel like a struggle are now achievable, and your body flows gracefully.
4. Final Foam Rolling:
End your practice with a final foam rolling session. This is like the encore of a concert. It helps release any residual tension and enhances your post-yoga relaxation.
Tips for Total Body Bliss
Listen to Your Body: Pay attention to what your body needs. If a certain muscle is tight, focus your foam rolling on that area.
Stay Hydrated: Both yoga and foam rolling can be dehydrating, so drink plenty of water to keep your muscles happy.
Breathe Mindfully: During both yoga and foam rolling, take deep breaths to enhance relaxation and oxygenate your muscles.
In Conclusion: Total Body Bliss Awaits
Yoga and foam rolling are a match made in self-care heaven. The combination of gentle yoga stretches and targeted foam rolling creates a symphony of relaxation and flexibility. So, roll out your yoga mat, grab your foam roller, and let the total body bliss begin. Your muscles and mind will thank you!